February Acts of Kindness Challenge 2015

The February Acts of Kindness Challenge is a challenge that I took on with my family last year.    It was such a rewarding experience that my family and I have decided to do it again this year!  I invite you to join us and many others in spreading love and kindness all month!  The guidelines are below.

aesopactofkindness

When I think of the month of February, the first thing that comes into my mind is Valentine’s Day.  And when I think of Valentine’s Day, I am reminded of love.  So I thought it might be fun to challenge myself and my family to spread our love this month by performing at least one act of kindness each day.  When I suggested the idea to my family, they were all really excited.  I’m sure their excitement probably had something to do with me mentioning a reward at the end if we were able to complete it, but I know the real reward will be in the experience itself.

Act of Kindness Challenge Guidelines:

1.  I  have made this February Acts of Kindness Log  for each member of my family to record our acts of kindness throughout the month.  I printed it out for each family member and put it on the refrigerator.  Feel free to download and print it out as well if you would like to keep a record of your progress. 🙂

2.  Each day in February, each member of our family will perform at least one act of kindness and write it down on the log.  My definition of an Act of Kindness is: any action you take to brighten someone’s day without expecting anything in return.

3.  Each night at dinner, my family will share our acts of kindness with each other so we can continue to support and encourage each other.

4.  When the month is over, we will share what we learned with each other and take a vote to see how we want to reward ourselves!

I invite you to join us in this challenge and spread your love.  It only takes a small act to make a big impact.  Let’s make a difference together!  “Like” the Facebook page February Acts of Kindness Challenge or join the Facebook support group at February Acts of Kindness Challenge to share your ideas and inspiration. 🙂

Feel free to do more than one Act of Kindness a day.  Don’t be afraid to write them all down.  You may already do several acts of kindness each day without even realizing it.  The point here is to become aware of all the good things you already do and realize the impact it has on others.  You may also want to try to take it a step further and do some things you normally wouldn’t do.  When we make a small effort to brighten someone’s day out of love (not obligation), we are rewarded with happiness.  Anything done out of obligation is not an act of love and will only cause you to feel resentment.  It doesn’t matter whether your acts of kindness are random or intentional, but to honor your own self-care, please make sure they are performed out of love.

As you perform more acts of kindness, you may notice more acts of kindness being performed toward you.  Learn to accept these gifts with gratitude.  Many times it is more challenging for us to receive than it is to give.  We may resist acts of kindness toward us because we may feel like we will owe the other person, but when you let people do nice things for you, you are actually giving them a gift.

RESOURCES

Check out this link for some great Random Acts of Kindness ideas!

Check out this inspiring 5 minute video to see how one small act of kindness can make a big impact.

“Like” the Facebook Page The Random Acts of Kindness Foundation.

Check out the inspiring movie, The Letter Writer.  It is a great reminder of the impact our actions have on others, and the difference one act of kindness can make.

kindness mark twain

The initial blog post on this challenge can be found at Journey to Complete Wellness. 🙂

Do YOU have any kindness ideas, quotes, videos, or inspiration you would like to share?  Feel free to leave them in a comment below or share them on the February Acts of Kindness Challenge Facebook support group.  Thank you! 🙂

Awesome Stuff Tuesday: My Top 8 Discoveries of 2014

2014 has been a great year!  I have discovered some amazing people who have inspired me, motivated me, and helped me on my journey of personal growth.  I have also discovered some wonderful products, blogs, and websites that have made my life easier and more exciting.  Here are my Top 8 discoveries of 2014:

1.  PicMonkey – I use this website just about every day!  It is a FREE photo-editing website.  Most of the photos and quotes I post on this blog are created through PicMonkey.  Check it out if you haven’t already!

2.  Marie Forleo – Marie Forleo is a true inspiration to me.  She is funny, smart, beautiful, talented, and most of all, authentic.  She hosts a TV show called Marie TV, with a new episode every Tuesday.  Her mission is to help people create a business and life that they love.  Check out this quick 39 second clip of her introducing MarieTV.  https://www.youtube.com/user/marieforleo

3.  Wet Brush – The Wet Brush has been a HUGE timesaver for me.  With three girls who don’t enjoy having their hair brushed, mornings have been made so much easier since we got this brush!  I don’t know what the secret is to the brush, but it works!!  I have recommended it to all my friends.  If you have a little girl and brushing hair is a struggle, give this brush a try!

September 15, 2014 040 September 15, 2014 044

4.  Brendon Burchard – Brendon Burchard is a personal development trainer.  I discovered one of his free on-line trainings this year, and I thought he was a true inspiration!  He is a wonderful speaker, the information he reveals is invaluable, and his generosity in revealing his knowledge is admirable.   He has also written several books.  This year I read his book The Charge which was very inspiring and motivating to me (see my review here).  If you want to start living out your life’s purpose and would like a little motivation, check out this free 30 minute on-line class by Brendon Burchard.  You won’t be disappointed!

5.  Creative Live – Creative Live is a website that provides FREE creative classes from the world’s top experts. They tend to focus mainly on photography, but there are classes in MANY other areas as well.  Check it out, but beware:  you may become totally engrossed in the class and not want to do anything else or get anything done while the class is on.  Check out my review on Creative Live here.

6. Craftsy – Craftsy is a website that provides on-line classes in sewing, art, woodworking, cooking, and many other different hobbies.  Many of the classes require payment, but there are also some FREE mini-classes.  I have not yet tried the paid classes, but I took the Complete Knife Skills class with Brendan McDermott and it was awesome!  Check out my review and the link to the class here.  I am looking forward to taking more of the free classes in the coming year, so stay tuned for my reviews on those.

7.  Akiane – Akiane is a child art prodigy.  I discovered her story in the book “Heaven is For Real”, and I was fascinated by her story.  Check out her story and amazing paintings here.

8.  I discovered MANY inspirational books.  Check out the Top 10 inspirational books I read in 2014 here.

What amazing things have you discovered this year?  Please leave a comment below. 🙂

Holiday Craft: Graham Cracker Houses

Graham Cracker House Fun web

One of our favorite traditions around this time of year is making graham cracker houses.  My daughters and I usually reserve the first Saturday afternoon in December for this.  I let each of them invite a few friends, and we have a fun afternoon listening to Christmas music, making graham cracker houses and tree ornaments, and making some wonderful memories!

To make the graham cracker houses, you will need:

Graham cracker set up

  • 1 sleeve of graham crackers per person (more or less depending on the size of house you wish to build)
  • candy, sprinkles, etc. (we like to use pretzels, mini marshmallows, gumdrops, gummy bears, fruity pebbles, M & M’s, jellybeans, chocolate chips, coconut, and whatever else we can find that is colorful.  Be creative.
  • icing (see recipe below)
  • serrated knife (for cutting graham crackers)
  • a tray or paper plate or a piece of cardboard or foam board to make your creation on (one for each person)
  • individual bowls or containers for frosting (one for each person)

Icing Recipe:

December 6, 2014 041 crop

  • 2 pounds confectioners sugar
  • 6 Tablespoons Wilton Meringue powder (this can be found in the cake section at craft stores, etc.)
  • 3/4 cup water

Add all ingredients to a stand mixer.  Mix on low for 10 minutes.  It will thicken/harden as time goes on.  This made enough frosting for 5 houses.  You may need more or less depending how big your house is and how many people you have.

To make the Graham Cracker House:

Making the actual house requires some time and patience.

  1. We usually start with a full graham cracker and one half graham cracker.  I like to dip one end of the half-graham cracker into my bowl of frosting, and carefully adhere it to the full-sized graham cracker at a 90 degree angle.  Here is a picture (only without the frosting). December 9, 2014 002
  2. I will then add another half graham cracker opposite the first half-size graham cracker.  Dip opposite ends into the frosting.  Adhere one end to the other side of the full graham cracker. December 9, 2014 003
  3. Add the final full-sized graham cracker opposite the first full-sized graham cracker.  This is what it should look like (only with frosting added to bind the edges together.)December 9, 2014 004
  4. Once you have the foundation of the house done, let it sit and harden for a few minutes before attempting to add the roof.  If you add the roof while it is still wet, it will keep falling apart, and it can be frustrating.  During this time, we like to work on decorating the ground.  Add frosting for snow, and decorate as desired.
  5. Once the foundation is dried and secure, take 2 full sized graham crackers and put them together at a 45 degree angle to form the roof.  Once done, it should look something like this:December 6, 2014 042 crop
  6. Now comes the fun part!  Decorate as desired using candies, sprinkles, pretzels, etc..  Be creative and have fun!! 🙂  This is how my 12-year-old’s came out this year:

December 6, 2014 040 crop

Holiday Craft: Fuse Bead Ornaments

One of my favorite things about this time of year is it is filled with so many wonderful traditions.  I love traditions, and we are continuously making new ones in our family.  One of my favorite days of the year is the day after Thanksgiving — Black Friday.  And the reason has nothing to do with shopping.  This year, my family spent the entire day together in our pajamas with nowhere we had to go and nothing we had to do – something that doesn’t happen often enough.

When we woke up on Friday morning, the snow was gently falling outside.  We made homemade french toast from the remains of the bread we freshly baked on Thanksgiving.  We listened to Holiday music, gradually took out our Christmas decorations and ornaments, reminiscing of past Christmases with each ornament we took out, and enjoyed the slow pace of our day and time spent together.  When we finally got the tree and decorations up, we made some ornaments for the tree and then we watched some of our favorite Christmas movies. For me, A perfect day! 🙂

My girls decided to take out their fuse beads and try to make ornaments out of them.  Here is what we came up with:

December 1, 2014 003 crop2

These were very simple, but fun crafts.  My girls had so much fun making these!  To make the heart ornament shown in the tree, you will need:

Supplies:

  • Cookie cutters – any size or shape will do
  • Fuse beads
  • Parchment paper
  • Popsicle stick

Directions:

  1. Place parchment paper on a cookie sheet. (Do not use waxed paper.  I tried this, and the beads would not release from it after cooking.
  2. Put cookie cutter on parchment paper.  Fill cookie cutter with fuse beads in a single layer.December 2, 2014 030 crop
  3. Once you have filled your cookie cutter with beads, gently remove cookie cutter, being careful not to move any of the beads.December 2, 2014 031 crop
  4. Carefully and slowly place cookie sheet in oven.  Be careful not to disrupt the pattern.
  5. Put in oven at 400 degrees for 10 minutes.December 2, 2014 027 crop
  6. Remove from oven.  With a popsicle stick, gently push the beads around the edge of your mold back into shape (if necessary.)
  7. Let cool.  Remove from parchment paper.
  8. Tie riboon, string, yarn, etc. of your choice.
  9. Proudly hang in your tree! 🙂December 2, 2014 034 crop

Alternatively, you may choose to leave the cookie cutter on the cookie sheet when you place it in the oven (if you do this, make sure it is an oven-safe metal cookie cutter.)  However, when I tried this, I had a really difficult time removing the beads from the cookie cutter after it cooled.

Happy crafting!! 🙂

Gratitude Stew

I think this is such a wonderful idea! I’m going to start it with my family today. I think this exercise will help us appreciate the little things in life that we often take for granted. The more we focus on what we are grateful for at this moment in our lives, the happier we will be in this moment. Remember, the attitude of gratitude always brings happiness! 🙂 This is a great way to get the entire family involved!

edible South Shore & South Coast Blog

Deb’s Recipe For 365 Days of Gratitude

2934

Happy ( almost ) Thanksgiving! Just thinking about the true meaning of Thanksgiving makes me feel happy and grateful! Loved ones gathering from far and wide (and sometimes just down the road or next door ) to feast on food made with  lots of love by many busy hands and the blessings of being together. Imagine what would happen if we kept that feeling alive every day of the year? I’ve been thinking about it a lot and I believe I’ve got the beginnings of a GREAT (and SIMPLE ) recipe for a delicious and life-changing “gratitude stew ”  and I need your help to finish it! Are you game?

View original post 638 more words

The “Thank You” Game

Note:  I originally posted this last year on my blog Journey to Complete Wellness, but it is such a fun and rewarding game, I thought it was deserving of another post this year.  I hope you will play along! 🙂

feeling gratitude

One of the books that has had the greatest influence on my life so far is the book “Life Makeovers” by Cheryl Richardson.  This book is broken up into 52 weeks, and each week she focuses on a specific topic and gives advice and tips on ways to improve your life in that area. (Find out more about the book and how it has changed my life here.)

I have followed along with this book each week for the past 7 years, and my favorite piece of advice in the book comes from this week before Thanksgiving, Week 47.  The title of Week 47 is called The “Thank You” Game.  Cheryl suggests thanking one person a day for the next week.  It can be a teacher, bus driver, librarian, friend, spouse, child, a parent, postal worker, doctor, etc.  It can be anyone you come into contact with regularly that you would like to thank.  You can thank them by simply writing an unexpected note or e-mail, or by attaching a small gift like a box of chocolates or flowers or anything they might like.

I love this exercise because it is being done out of sincere gratitude, not obligation.  The recipient is usually not expecting anything, so they are usually very appreciative of the gesture.  It is a win-win situation on both sides.  We all love to feel appreciated, and it’s a great feeling to know your small gesture brightened someone’s day.

During the next 7 days, I am going to choose at least one person a day to thank.  Help me spread the gratitude and love this week by playing along with Cheryl Richardson’s “Thank You” game!  Who are you going to thank this week?

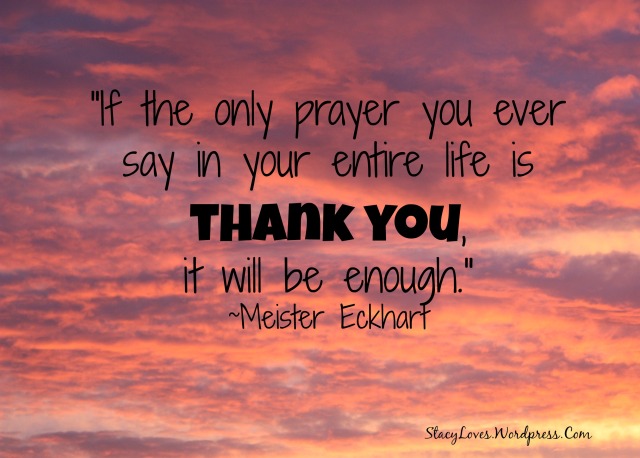
Meister Eckhart Thank You sunset4

Our Thanksgiving Tradition: Counting our Blessings Turkey Decoration

I love Thanksgiving and all that it represents.  It is a day filled with love, family, food, GRATITUDE, and traditions.  It is a time to give thanks for all the blessings in our lives.

This beloved turkey has become a favorite Thanksgiving tradition in our house.  He returns each year around this time to remind us of how blessed we truly are.  This weekend my kids asked if we could take it out, and they were all really excited to help put it up.

Counting our Blessings Turkey

Each year we ask our Thanksgiving guests to fill out a feather and write what they are thankful for.  When we take it out each November, it fills our hearts with love and wonderful memories of past Thanksgivings and reminds us of how blessed our lives have been and all we have to be thankful for today.  Occasionally we are reminded of people or things that are no longer in our lives, but that just reminds us that nothing really belongs to us and we need to take nothing for granted.  Everything in our lives right now is a gift and blessing from God.  We need to focus on the present and try to recognize and appreciate all the gifts in our lives today and every day.

Although this is a fun way to involve my family in practicing gratitude at Thanksgiving, I think it’s important to try to live every day of our lives in a state of thanksgiving.  I believe that the attitude of gratitude always brings happiness.  When we learn to be content with what we have and learn to view every person, every thing, and every situation in life as a gift, we can’t help but be happy.

May you recognize and appreciate the gift of every person, every thing, and every experience you encounter today!  Peace and blessings!  🙂

“Be joyful always; pray continually; give thanks in all circumstances;” 1 Thessalonians 5:16-18 NIV


To make the Turkey Decoration:

Supplies Needed:

  • Thin Cardboard, not corrugated (12″ wide x 12″ tall)
  • Construction paper or card stock (brown, red, yellow, and any additional colors you choose for the feathers)
  • Scissors
  • Turkey Feather Template
  • Turkey Parts Template
  • Google Eyes (optional)
  • Markers or crayons (optional)
  • Tape or Glue
  • Putty (for mounting to the wall)

Instructions:

  1. Using the 12″x12″ piece of cardboard, trim off the corners and shape into an approximate circle.
  2. Print out Turkey Parts Template.
  3. Color legs and snood red or trace onto red card stock and cut out.
  4. Color neck brown or trace onto brown card stock and cut out.
  5. Color beak yellow or trace onto yellow card stock and cut out.
  6. Using tape or glue, attach the neck to the body.
  7. Attach the legs to the body.
  8. Glue beak and snood onto the neck.
  9. Glue on googly eyes or cut out circles for eyes using cardstock or construction paper.
  10. Attach completed turkey to the wall using putty (this makes it easy to come off without damaging it, so you can reuse it year after year).
  11. Print out Turkey Feather Template.  Trace onto card stock or construction paper using your color of choice.
  12. Begin writing what you are thankful for, and add feathers to the wall as you complete them.
  13. After thanksgiving, store safely with your other decorations.  Take it out each year and let it fill your hearts with love and wonderful memories of past Thanksgivings.

30 Days of Thankful: Days 1-4

Meister Eckhart Thank You sunset4

When I think of November, the first thing that comes to mind is Thanksgiving…my favorite holiday!  For me, Thanksgiving means food and family, but it also means giving thanks for every little thing in my life.  It means recognizing and appreciating ALL the blessings surrounding me each day.

This entire blog is devoted to giving gratitude every day of the year, but during the month of November I try to make an extra effort to recognize the gifts in my life that I often take for granted.

I believe gratitude is the key to happiness.  I don’t believe it is possible to be unhappy when you are in a state of gratitude.

This month I am going to challenge myself write one thing I am thankful for each day.  I encourage everyone to look for the good in everything (because there IS good in EVERY situation), and see how many things you can think of to be thankful for today.  I invite you to join me in keeping a gratitude journal this month.  Each day, choose one thing you are thankful for or make a list of all the good things you encountered during the day, and see how your spirits lift during the month.  Here are my first 4 days:

Day 1:  Saturday, November 1

I’m thankful I was able to spend this cold and rainy Saturday comfortably at home with my family.  With nothing on the schedule and no place we had to be, we spent the afternoon in our pajamas, snuggled up together on the couch, watching some of our all-time favorite movies.  We all need days like this once in a while.  As much as I try to keep Saturdays open and schedule-free, days like this don’t happen often enough.

Day 2:  Sunday, November 2

I am thankful we got the first snowfall of the season.  While some were complaining that it was too early for snow, I think the first snow is always so exciting!  My girls had a blast playing in it!  We enjoyed it while it lasted because it was gone in less than a day.

November 2, 2014 034 November 2, 2014 038

I am also for this beautiful sunset on Sunday evening.

November 3, 2014 009

Day 3:  Monday, November 3

I am so grateful for the wonderful privilege of motherhood. 12 years ago today, I became a mother and it has been my most rewarding and life-changing experience to date. It taught me to slow down and appreciate the moment.  It taught me the true meaning of love.  It taught me to look at everything through a child’s eye and see the awesomeness of everything in nature and life.  And it ultimately brought me closer to God. I am so blessed!

Day 4:  Tuesday, November 4

I am thankful for the ever-changing New England weather.  Two days ago, it was freezing and there was snow on the ground.  Today it was 65 degrees and sunny.  The winter coats came off, and the short-sleeved shirts came back out.  The kids had the day off of school since it was election day.  It was a beautiful day to be outside, enjoy the day, and celebrate my daughter’s birthday with wonderful friends.

How to Start Living out Your Life’s Purpose

“At the end of our lives we will all ask, ‘Did I live?  Did I love?  Did I matter?” ~Brendon Burchard

BrendonBurchardLiveFully

Are you ready to start living out your life’s purpose?  Do you need a little motivation?  Brendon Burchard, author of The Motivation Manifesto, shares some invaluable tips in this FREE 30-minute video to get you motivated and on the path to fulfilling your life’s work and help you to make your mark in this world.  In this video, he provides invaluable tips and free downloadable tools, and he also reveals the one thing you should NOT be doing in the morning if you want to have a productive day.  I have not yet read any of Brendan’s books, but I intend to read them soon, starting with The Motivation Manifesto.  I have seen several of his free videos, and I think he is a true inspiration!  He is a wonderful speaker, the information he reveals is invaluable, and his generosity in revealing his knowledge is admirable.  I felt this 30-minute video was a valuable use of my time.  I learned some wonderful tips to start taking back my days and gain momentum with my goals.  Check it out here and begin to take control of your days in order to maximize productivity.  Check out more valuable videos from Brendon on his You Tube Channel here.

“There is always time each day to progress towards our dreams.  Believing otherwise condemns us to a life of mediocrity.” ~Brendon Burchard

Easy Halloween Costume Idea: Crayola Crayon

October 21, 2014 057

Halloween is just over a week away!  If you’re looking for an easy costume idea, you have come to the right place.  Last week, I shared how I made an easy Candy Corn Halloween Costume for my 6-year old.  In that post, I mentioned that two of my daughters wanted to be Crayons for Halloween this year.  With a little inspiration from this post at Stitch a Wish Designs and a few ideas of our own, we seem to have come up with a costume that my girls are really happy with.  Our costumes didn’t come out perfect, but my daughters really enjoyed taking part in creating their own costumes, and I love that we were able to do this together.  We even had my daughter’s friend over and we made one for her as well, so they are very excited to go trick-or-treating together in matching costumes.  They were really happy with the way they came out, and that’s really all that matters to me. 🙂  My 11-year-old did the entire Crayola design on her own for all 3 costumes, and she was very proud of herself.

This costume really was very inexpensive and very easy to make (each costume cost me under $7.)  On Halloween, they will be wearing shirts underneath that match their crayon color (so it should look much better than it does here), but I couldn’t get them to put them on for this picture.  You need to choose your battles, right? 🙂

October 17, 2014 041

Supplies Needed per Costume

  • 1 Yard Felt – Color of your choice (this was $2.99 at Joann Fabrics)
  • 1 Roll Black Duck Tape (this cost $3.37 at Walmart…I was able to make 3 costumes with this)
  • Party hat ($1 at Dollar Tree)
  • Craft knife or utility knife or even a kitchen knife (I already had this on hand)
  • Velcro (optional)
  • Sewing needle and thread (I had this on hand)
  • Hot glue (or other adhesive)

Instructions

  1. Wrap felt around child and secure with Velcro.
  2. Cut to desired length.
  3. Cut a 1″ strip of felt (for the shoulder straps).  I cut a long strip, so just folded it in half to make 2 straps.
  4. Wrap the felt around the child again and mark where the straps will go (I used pins to see where I would need to sew.)
  5. Sew the straps on (or use adhesive of your choice to secure them).
  6. Approximately 4-5″ from the top of your fabric, roll out a strip of black duck tape horizontally all the way across the fabric.October 21, 2014 046
  7. Approximately 4-5″ from the bottom of your fabric, roll out a strip of black duck tape horizontally all the way across the fabric.  It should look like this: October 21, 2014 047
  8. Using a craft knife, cut about a 1/4″ thick wavy line of the duck tape on each of the horizontal strips you just added.  Remove the 1/4″ wavy line of duck tape to expose the felt underneath.  Be careful to cut only through the duck tape and not through the fabric as well.  This step took me the longest. October 20, 2014 024
  9. Using duck tape, create the Crayola design as best you can.  My 11-year old daughter did this part on her own.  Look at a Crayola crayon for guidance.October 17, 2014 Kira Crayon
  10. This is what ours looked like when completed.October 17, 2014 038

To make the hat:

  1. Open the hat and lay it over the extra felt.  Trace around the hat onto the felt with an Ultra Fine Point Sharpie.
  2. Cut out the felt.
  3. Close the hat back up.  Hot glue the felt to the hat.
  4. Cut a 4″ x 24″ strip of felt.
  5. Beginning at the seam, fold the strip in half so about 2″ is showing on the outside of the hat and about 2″ is inside the hat.  Attach the felt all the way around on the inside using duck tape.October 21, 2014 060
  6. Once done, the hat will look like this.  Feel free to cut off the tip if you don’t want to be a sharp crayon.October 21, 2014 061

I hope this post was helpful.  If you decide to make a crayon costume, I would love to hear how it turned out and I’d love to hear of any variations you made.  Happy Halloween!! 🙂